Custom Injection Molding for Unique Products: A Step-by-Step Guide to Tailored Solutions
Imagine a scenario where a product's success hinges on its ability to stand out in a crowded marketplace. Custom injection molding can be the key to unlocking this potential, enabling the creation of unique, high-quality products that meet specific requirements. This guide will walk you through the
Custom Injection Molding for Unique Products: A Step-by-Step Guide to Tailored Solutions
Imagine a scenario where a product's success hinges on its ability to stand out in a crowded marketplace. Custom injection molding can be the key to unlocking this potential, enabling the creation of unique, high-quality products that meet specific requirements. This guide will walk you through the intricacies of custom injection molding, providing a roadmap to tailored solutions that address your unique challenges.
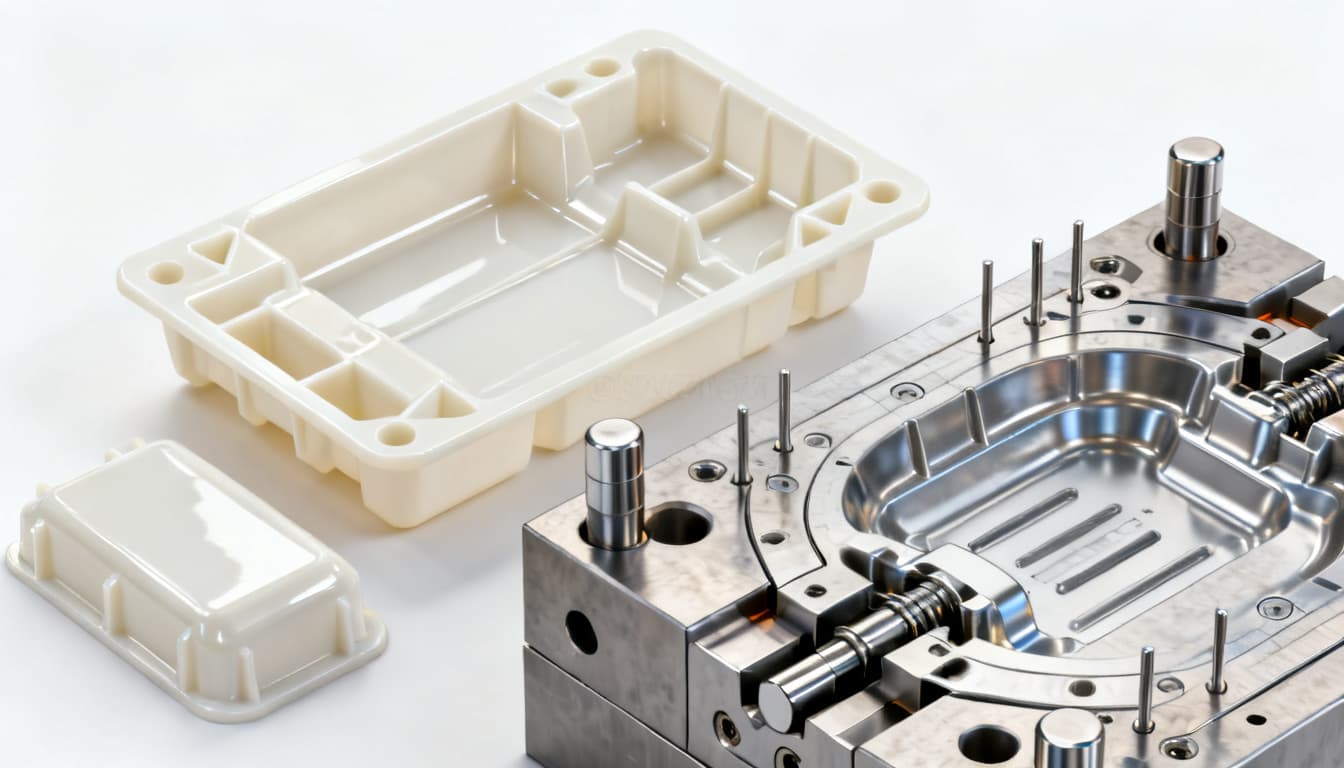
Understanding the Custom Injection Molding Process
Material Selection: Choosing the Right Polymer
Material selection is a pivotal step in custom injection molding, as it directly impacts the product's performance, appearance, and cost. Common materials include Acrylonitrile Butadiene Styrene (ABS), Polypropylene (PP), Polycarbonate (PC), Polyamide 66 (PA66), Polyoxymethylene (POM), and Thermoplastic Elastomers (TPE).
| Material | Melting Temperature (°C) | Typical Applications |
|---|---|---|
| ABS | 220 - 260 | Consumer electronics, automotive parts |
| PP | 170 - 200 | Packaging, household goods |
| PC | 270 - 310 | Optical discs, safety helmets |
| PA66 | 260 - 290 | Mechanical components, textiles |
| POM | 190 - 230 | Precision gears, fasteners |
| TPE | 180 - 230 | Seals, grips |
Design Considerations: Balancing Functionality and Manufacturability
When designing for custom injection molding, it's crucial to adhere to industry standards such as ISO, ASTM, and DIN. Key design rules include maintaining wall thickness between 1-3mm and incorporating draft angles of 0.5-2° to facilitate part ejection. These parameters minimize defects such as warping and sink marks.
Step-by-Step Guide to Custom Injection Molding
- Define Product Requirements: Clearly outline functional, aesthetic, and performance criteria.
- Select Appropriate Material: Use the material comparison table to choose the best polymer for your application.
- Design the Mold: Follow design guidelines to ensure manufacturability and quality.
- Prototype and Test: Develop a prototype to validate design assumptions and make necessary adjustments.
- Optimize Process Parameters: Fine-tune settings such as melt temperature, injection pressure, and cycle time to achieve optimal results.
- Conduct Quality Control: Implement rigorous testing to ensure the final product meets all specifications.
Optimizing Injection Molding Parameters
Setting the Right Melt and Mold Temperatures
Achieving the correct melt and mold temperatures is crucial for producing high-quality parts. For example, ABS requires a melt temperature of 220-260°C and a mold temperature of 50-80°C. Deviating from these ranges can result in poor surface finish or incomplete filling.
Adjusting Injection Pressure and Speed
Injection pressure and speed must be carefully controlled to prevent defects such as flash or short shots. Typical injection pressures range from 70 to 140 MPa, depending on the material and part complexity. A gradual increase in pressure can help achieve uniform filling.
Cycle Time Optimization
Cycle time directly impacts production efficiency. It consists of injection, cooling, and ejection phases. While a shorter cycle time increases throughput, it should not compromise part quality. For instance, reducing cooling time might lead to warping if the part is ejected too soon.
Common Defects and Their Solutions
Warping
Warping is often caused by uneven cooling or excessive shrinkage. To mitigate this, ensure uniform wall thickness and optimize cooling rates. Adjusting mold temperature and cooling time can also help.
Sink Marks
Sink marks occur due to insufficient packing pressure or thick sections. Increasing packing pressure or redesigning parts to avoid thick sections can alleviate this issue.
Flash
Flash is caused by excessive injection pressure or mold misalignment. Reducing injection pressure and ensuring proper mold clamping can prevent flash.
Cost Considerations in Custom Injection Molding
| Cost Component | Percentage of Total Cost |
|---|---|
| Material | 30% |
| Tooling | 40% |
| Labor | 20% |
| Overhead | 10% |
Practical Tip: To reduce costs, consider using multi-cavity molds, which can significantly increase production efficiency and lower per-part costs.
Conclusion
Custom injection molding offers immense potential for creating unique products that meet specific needs. By carefully selecting materials, adhering to design guidelines, and optimizing process parameters, manufacturers can achieve high-quality, cost-effective solutions. If you're ready to explore custom injection molding for your unique products, get a free quote from our experts today.