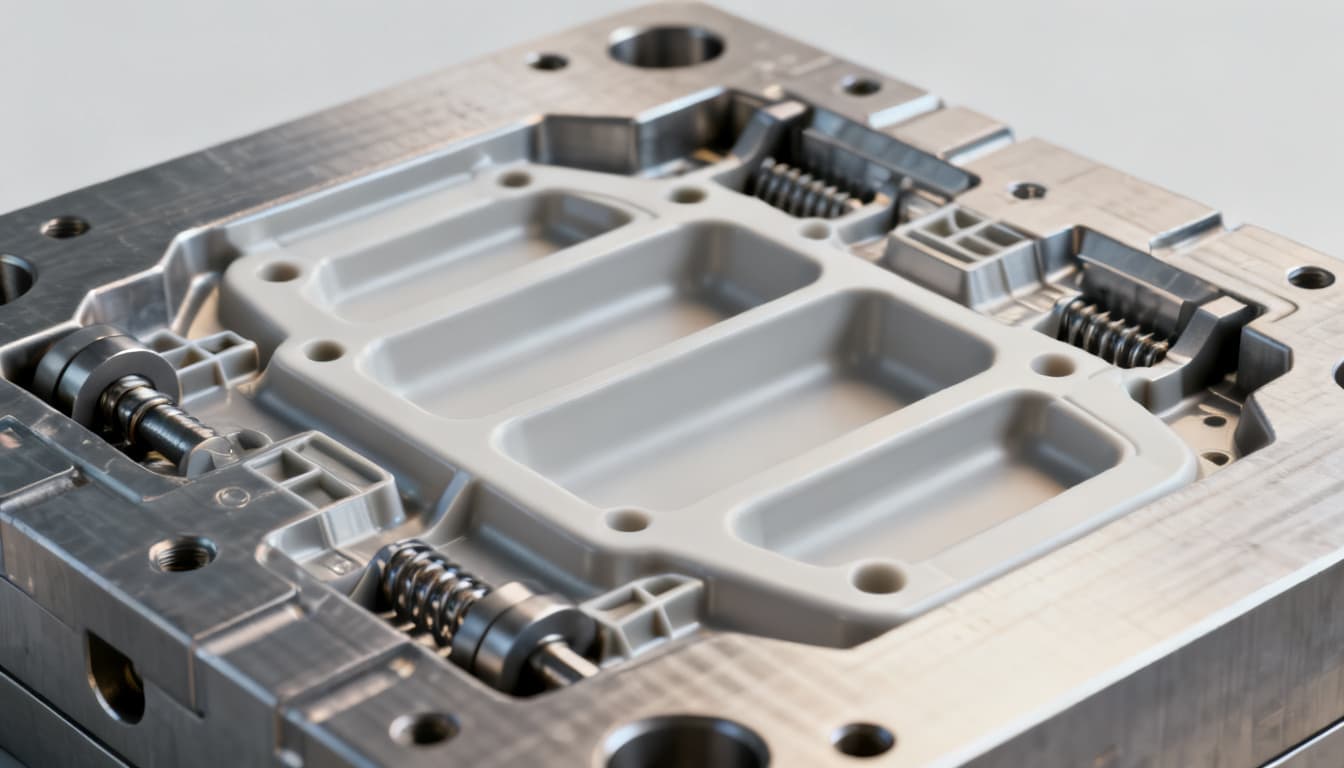
Designing for Injection Molding: Top 10 Best Practices to Ensure Quality and Efficiency
Injection molding is a complex process where precision and detail can make the difference between a successful product and costly production errors. Designers often encounter challenges such as material selection, part geometry, and process optimization. This article outlines the top 10 best practic
Designing for Injection Molding: Top 10 Best Practices to Ensure Quality and Efficiency
Injection molding is a complex process where precision and detail can make the difference between a successful product and costly production errors. Designers often encounter challenges such as material selection, part geometry, and process optimization. This article outlines the top 10 best practices to help you navigate these challenges effectively.
1. Optimize Wall Thickness
Ensuring consistent wall thickness is crucial for reducing stress and preventing defects such as warping and sink marks. Aim for a uniform wall thickness between 1-3mm depending on the material used.
Material Considerations
Different materials require different wall thicknesses. For instance, ABS typically works well with 1.5-3mm, while PP can handle slightly thicker walls. The table below provides a comparison:
| Material | Recommended Wall Thickness (mm) |
|---|---|
| ABS | 1.5-3.0 |
| PP | 1.8-3.5 |
| PC | 1.8-3.0 |
2. Incorporate Proper Draft Angles
Draft angles facilitate the ejection of the part from the mold. Without them, you risk damaging the part or the mold itself. A draft angle of 0.5-2° is typically recommended.
Design Guidelines
For vertical walls, consider a minimum draft of 1° for most materials. For textured surfaces, increase the draft angle to account for the additional friction.
3. Use Ribs to Enhance Strength
Ribs can significantly improve part strength without increasing wall thickness, thereby reducing weight and material usage.
Rib Design Tips
Ensure rib thickness does not exceed 60% of the main wall thickness to prevent sink marks. The height-to-thickness ratio should be less than 3:1 to avoid structural weaknesses.
4. Select the Right Material
Choosing the appropriate material is critical for ensuring product performance and manufacturability. Below is a table comparing some common materials:
| Material | Melt Temperature (°C) | Mold Temperature (°C) | Applications |
|---|---|---|---|
| ABS | 220-260 | 50-80 | Automotive, Electronics |
| PA66 | 260-290 | 70-100 | Gears, Bearings |
| POM | 190-230 | 80-120 | Mechanical Parts |
5. Minimize Cycle Time
Cycle time is a critical factor in production efficiency. It consists of injection, cooling, and ejection phases.
Steps to Reduce Cycle Time
- Optimize cooling channels to enhance heat dissipation.
- Use hot runner systems to reduce waste and improve cycle time.
- Employ faster ejection mechanisms, such as air blasts or robotic arms.
6. Address Common Defects
Understanding and addressing the root causes of common defects can save time and resources.
Defect Solutions
Warpage can often be mitigated by ensuring uniform cooling and proper material selection. Sink marks are usually addressed by optimizing wall thickness and rib design.
Practical Tip: Regularly calibrate your equipment to maintain optimal injection pressure settings, typically ranging from 50-150 MPa, to avoid defects like flash and short shots.
Conclusion
By adhering to these best practices, you can enhance the quality and efficiency of your injection molding process. Keep in mind that each project may require specific adjustments, so always tailor these guidelines to your unique requirements. For further assistance or to discuss your project, feel free to get a free quote from our experts at Panda Molding.